Tuesday, 17 April 2018

Project 4: The blister

Project 4: The blister

Introduction

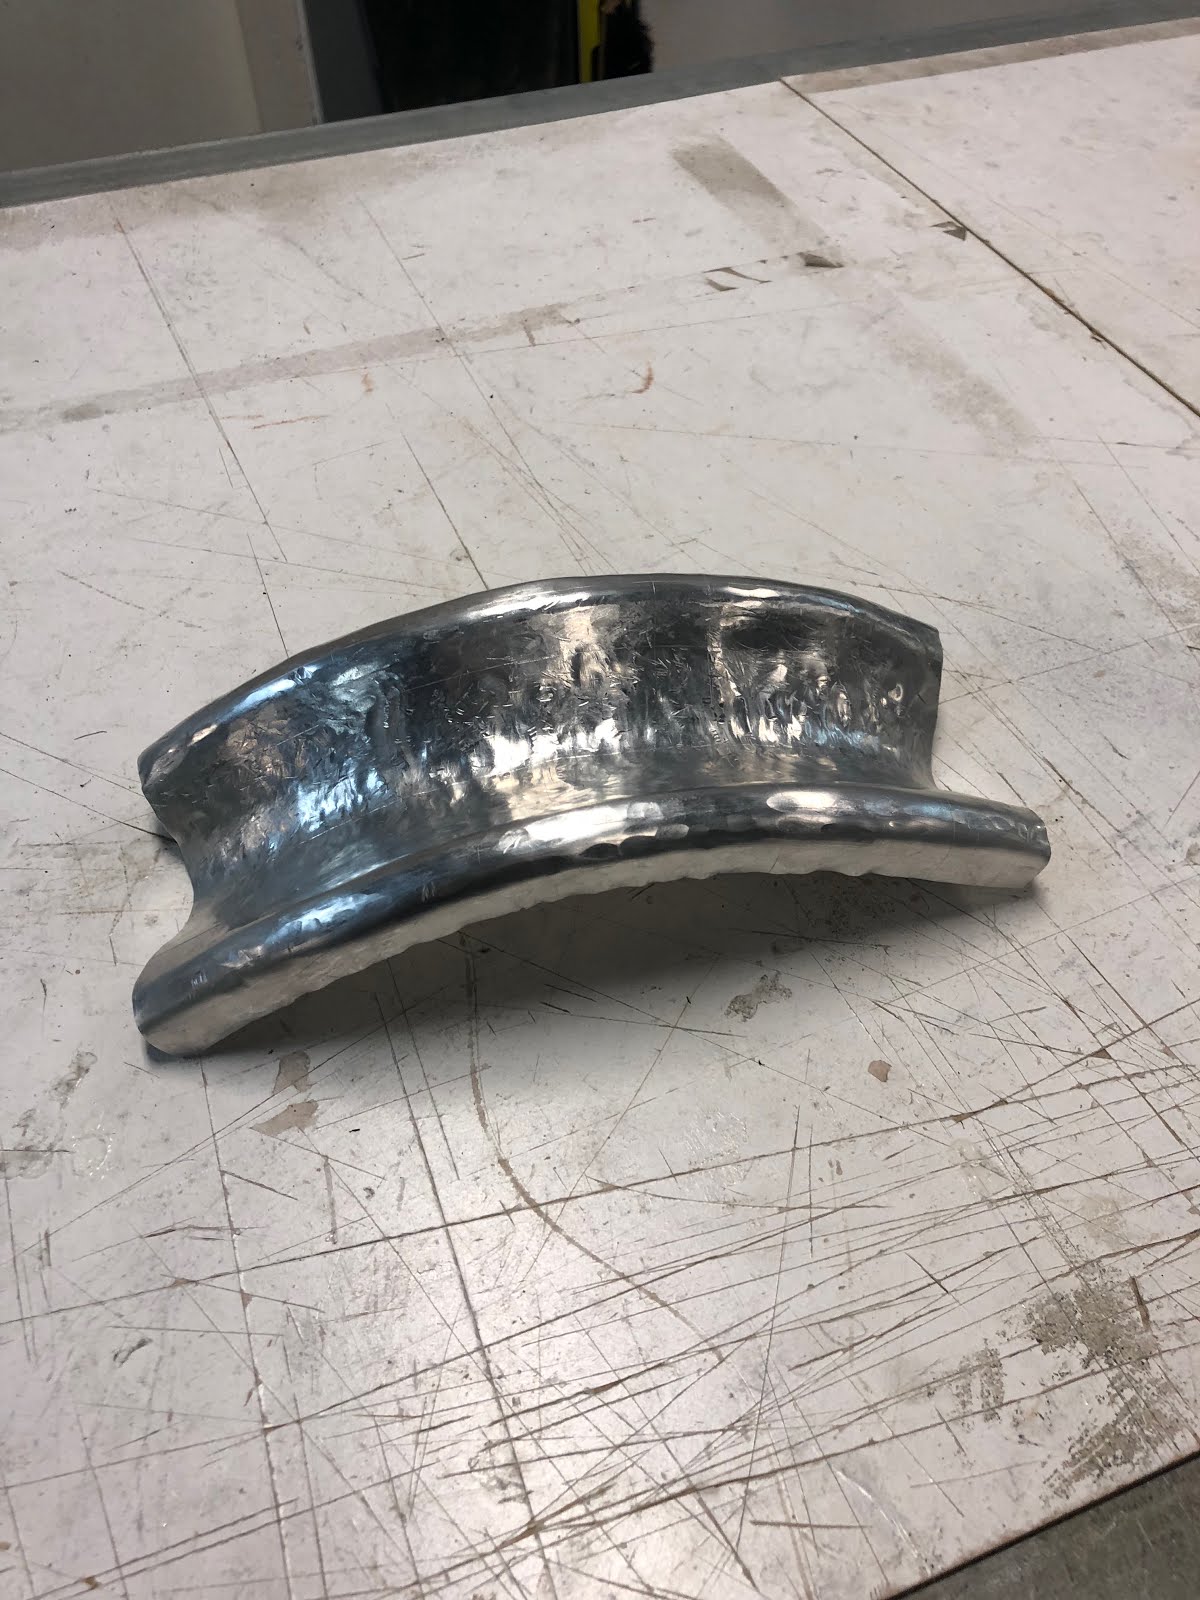
This is the fourth project for BEIL0014 I have been working on, which is hammering out a blister on a sheet of aluminium with aid of a hollow double sided wood mold . My objective is to create a blister that has a clear edge with maximizing its depth. 

Theory
As I have been given a relatively big mold for this project, which means there is more metal available to be stretched out, my aim is to let the metal reaching its ultimate strength. The following shows a graph of metal behavior of stress vs strain. 
Before the sheet metal fracture, the metal will undergo strain hardening which become harder and harder as it stretches. My strategy was to apply this theory and hammer the metal evenly at constant strength so that the unstretched part will keep stretching and the fully stretched part will stop stretching. This will keep me from breaking the sheet metal. 

Procedure

To begin with, I place the sheet metal between two molds and drilled four holes in the corner. Then I add 4 screw each at the holes that I drilled before. This is used to stabilize the sheet metal as I hammer it. 
After that, I put two plank of wood on each side of the wood mold to increase the ground clearance,  next I clamp the whole thing to stabilize the set up as hammering will movement to the product.  

Next, I took a stick of wood and sharpen it at the grinder, then with aid of the stick I was able to hammer the edge to the mold to give a distinctive look of the blister.


The whole process I used plastic head hammer to give a smooth surface. Then hammer it with constant strength until is nearly reaches its ultimate strength
The finish product are shown as follow:


Project 3: The Tray

Project 3: The Tray 

Introduction

This is the third project for BEIL0014 for making 2 identical trays with the cooperation of two people. For this project me (Louis) and Iverson formed a team of 2. 

Procedure

We start with 2 plank of wood and 2 sheets of metal. First I have chosen a suitable radius for the corner of the tray which is 50mm. I then draw lines around the plank of wood with the circle tool disturbed in class. 
Next, I bring the plank of wood to the grinder to grind out the extras
Until the wood perfectly matches with the circle tool. 
In order to achieve a symmetric shaped tray, I measured the length of the plank and the sheet metal and draw markings on the sheet metal so that the plank of wood sit exactly in the middle of the metal. 

The marking are shown on the metal for both sides:
Next, again with the help of the circle tool, I was able to cut off the sharp edge of the metal and turn them into rounded corners. 
Then I place the metal in between two wood planks with the wood sit exactly in the marks I have created previously. I then place the whole thing in a large clamp which is directly attached to the working bench. The hammering process then begins. 
Metal fold is very common in the process of working on corners. The solution to avoid metal folding is to add a support underneath the corner while hammering. 
After the work has been nearly finished, it has been taken out from the mold to do some minor fix on the metal since the tray has been deformed a bit in the process of taking the wood out of the tray. 

Next, it is bring to coarse sand paper to grind the bottom and making the tray look even. And for the surface of the tray, different grades of sand paper has been applied from coarse to fine. This makes the finishing of the tray looks shiny. The process is being repeated for the second tray.
The finishing product is shown as below:

Tuesday, 20 March 2018

Project 2: Reverse Curve

Project 2: Reverse Curve

Introduction

This is the second project for BEIL0014 for making a torus which is referred as a reverse curve in meal shaping, the following shows the procedures. 

Procedure

Starting with a sheet of aluminium, same as before, crafting tool is used to mark the sheet with calculated parameters. The measured width of the sheet metal is 11.85cm which I take it as 12cm for easier calculations.  The sheet of 12 cm width is being divide into three section. 

The left and right section with 3.5cm each reserved for constructing two peaks of the curve and the core (middle) section reserved for constructing the trough of the curve.
After that, middle lines are drawn in the middle of each section, so that there are five lines in total.
Next, the sheet is being pressed on a wooden cylinder, which creates the primary curve for the reverse curve. The wooden cylinder contain a sloped curve in the middle. Gradually bit by bit, I hammer in the middle of the sheet on the middle section only, this procedure is cooperated with another student  with one held the wood with sheet sticking to the curvature of it firmly and another one hammer the middle section of the sheet to create trough/ secondary curve of the reverse curve. 
The shape of the reverse curve has been created. 
Next, the thin curve shaped tool is being used to help create the peaks of the reverse curve. Using the line which I drawn previously, I was able to precisely hammer the 2 identical peaks from the left and right section of the sheet. This step is also cooperating with another student with one holding the sheet metal and another one swinging the finishing hammer. Finishing hammer is chosen for this job is because it is flat on the contact surface which is perfect if the sheet metal is supported with desire shape. 
 
This photo shows the before hammering alignment to the curve shaped tool on the right section. 

This is after hammering. 
This process is repeated on the left section of the reverse curve as well. After that, thinner curved tool is being used for more precised work. 
The curve from the reverse curve is matching the curved tool.

Tuesday, 13 March 2018

Project 1: The bowl

Project 1: The bowl

Introduction

This is the first project I have worked for BEIL0014 for making a bowl with the targeted radius of 155mm, the following shows the tools and procedures involved. 

Wooden tools

There are two types of wooden tools produced to help us to produce a uniform and round shape bowl. 1. The small wood board with three different types of radius, r125, r155, r275. In this project, I aim to create a bowl with r155. 

2. Circle wood strips with different radius. (d230, 180, 130, 80) These are used to draw perfect circles on the sheet aluminium to help hammering into a uniform bowl. 

Procedure

We start with a sheet of aluminium, crafting tools with the wooden circles are used to mark the sheet with permanent circles 


Next, metal is being cut in circle with the sharp edges caused by cutter to be grind away 


The metal is then ready to be hammered, I put the metal above the wooden panel which has a curved down shape to provide a gap for the metal to stretch and follow the profile of the wooden curve. I prefer to work from outer circle of the metal because it will be easier to start from edge and I expect two other side of the metal will shrink together causing a bent when I work on new area of the metal.  The circled area is an example of bent caused by shrinking. 
Then hammering work is gradually worked from outer circle to the centre of circle. Several  adjustment on of the metal has been made with the help of the wood board indicating the true r155 curvature. The following picture shows the first comparison between the curve of metal and the board. 

After the metal has turned into something like a bowl shape it is then brought to the English wheel where it's purpose is to act as a hammering to the bowl a thousand times in the line where the wheel and bowl make contact. Here I have chosen number 3 wheel since it has the best fit to my r155 objective. Since the wheel only covers a line of flattening, orientation has to change regularly and uniformly to produce smooth result. 
The bowl is then brought to a small metal hammer with the round metal as base.To remove any small uneven dents, after that it is bought back to English wheel.
Final measurement has been made to confirm the r155 is constant throughout the bowl.

measurement has been made in various spots, if the curve doesn't fit well, hammer is then used to adjust the curvature then it is brought to the English wheel, the process is being repeated until every spot of measurement is satisfied. 
Next, I went to Bunnings and try to find Brasso to polish the bowl but ended up I bought this. Together with the microfiber cloth, I was able to polish the metal and get the bowl finish.